
This post on stretching for hikers features a collaboration with adidas.
Hiking might not be seen by many as a strenuous athletic sport, but as discussed a little in my sports bras for hiking post, hiking can take quite a toll on the body. Hiking, especially long-distance, requires fitness, strength, stability, endurance, and focus.

As such, those who want to get the most and best from a long day or week (or more) hiking, should look after their body in the same way that any other sports person might. We should think about the whole lot; technique, fitness, training, nutrition, rest, and mobility (and probably some other things, too). One element of this is stretching for hikers, to keep the muscles flexible, strong and healthy.
I guess what I’m saying is, if hiking requires a supportive sports bra, and I think it often does, then it also requires muscle care. In an ideal world, we should think holistically and include stretching as part of our regular post-hike routine to help us recover fully and effectively.
As part of my 2023 collaboration with adidas, who are all about supporting us with the gear we need to get and stay fit, I want to share some hopefully useful information and inspiration to bring some simple stretching into your hiking routine.
Stretching for Hikers
As I’ve gotten older (meh to that!), the post-hike aches have become more and more real. Especially on multi day hikes such as the Cotswold Way. But stretching really does help. I do my best to make time – only five to ten minutes – to do these five simple stretches every time I’ve been hiking. When I do, getting up the following morning is always a little bit easier than when I don’t!
While at the bottom of the post I advise you to do these straight after hiking, I admit my routine tends to find me stretching after I’ve showered and changed. If I’m home, I will follow these with a bit of massage gun work thrown in for good measure, and if I’m away, I will always have my little cork ball to work on my feet.
But you’re here for the actual stretches – so here are five basic stretches I’ll do my best to explain in words and pictures so you can add them to your post-hike routine after your next day on your feet. Hold each stretch for 30-seconds or so before switching legs, and these five stretches will take you around five minutes to do.
Five Post-Hike Stretches
Quadriceps
Your quadricep muscle is the one down the front of your thigh. Its job is to help extend your knee, and as such, gets a real workout when you are descending hills.
To stretch it, stand upright and – one leg at a time – bring your heel towards the back of your hip (hold it with the hand on the same side) until you feel a pull down the front of your thigh. Keep your knees together and in line with each other, and push your hips forward slightly to increase the stretch.

Hamstring
Your hamstrings are located at the back of each thigh. They help bend your knee and assist with hip extension, and as such, are particularly active when you are walking uphill.
You can stretch your hamstring standing or seated – I tend to stay standing, but either works well.
Slightly bend one knee and allow the other to extend out straight in front of you. Keeping that knee straight, reach down towards it (bend from your middle, keeping your back straight), and lift your toes towards your hand. Your hand and toes may touch – but they may not need to for this stretch to work. Hold as soon as you feel a pull on the back of your leg.

Gastrocnemius
Ah the calf, my nemesis when it comes to post-hike aches. Your gastrocnemius is the muscle within the calf complex that does most of the work. It is the one that helps you push-off on each step, and can easily get tight.
For this stretch, stand upright, and place one leg straight behind you and the other in front. Your back leg should stay straight, with your heel on the floor. Bend your front leg until you feel a pull on the back of your lower leg, and hold. Pushing on a wall can help increase this stretch.
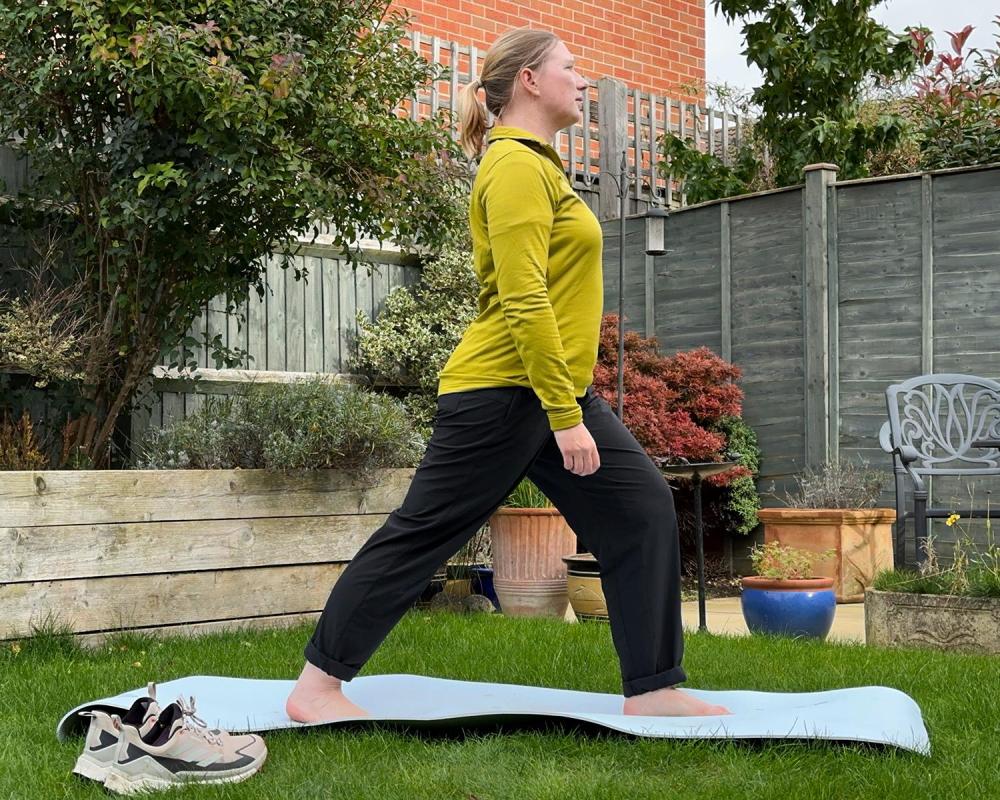
Soleus
The soleus is another big muscle which makes up the calf. It stabilises your ankle, and helps you to move forward – and as such works incredibly hard when hiking, especially when carrying extra weight on your back.
Like the gastrocnemius stretch, start by standing upright and putting one leg in front and the other behind you. Keeping your back straight and both feet flat on the floor (as much as possible), bend both knees and move your body down towards the floor until you feel a stretch on your back leg. I hardly have to bend my knees to feel this one.

Gluteal Muscles
I do this one last, as it’s the only one which requires me to lie on the floor. It’s a good one to lead into other stretching for my back and arms, which I’ve not covered in this post.
Your gluteal muscles are the ones at the back of your hip. They help extend your hip and control the movement of the knee. They work constantly when you hike as they are part of the gait cycle, but work especially hard when walking uphill.
Lie on your back with your knees bent and feet on the floor. Lift one leg and place the ankle on the front of the opposite knee. Join the hands behind the knee/thigh of the other leg, and pull it towards you, lifting the foot up until your lower leg is parallel (ish) with the floor. Hold once you feel the stretch take hold (don’t pull your leg too far).

Let an Expert Show You How
There are lots of other stretches you can (and should) include in your stretching for hikers list, including those that work muscles in the feet, back, shoulders, arms, and neck. But hopefully the five I’ve shared above gives you a decent starting point to help look after your leg muscles.
And of course, we should be stretching every day, whether we’ve been hiking or doing any other form of physical exercise or not. If you have 15-minutes and want to do something combining stretching with meditation, then I highly recommend this video.
I first added this routine to my almost-daily routine back in very early 2021, it’s such a nice post-hike practice (and is my end-of-work-day marker). It takes no time at all really, and never fails to put me in an excellent headspace. Here…
A Few Notes on Stretching for Hikers
Whether you follow my simple stretching for hikers routine, the video above, or another routine entirely, there are a few things to remember. Stretching itself can cause damage, so be kind to your body.
Lean into each stretch only as far as is comfortable, and use it as an opportunity to breathe deeply and concentrate on your muscles and posture. This is about relaxing both physically and mentally, and it’s well worth taking some time over it when you can.
Stretching should not be painful. Move gently, and gradually, ensuring that you feel secure and stable in each position (if you are shaking then pull back!). I find that getting my exercise mat out to stretch (mine is a lovely one from adidas) makes it much more of an event, and I get much more from it – although if you only have a minute or two then stretching while the bath is running or the kettle boils is still better than nothing.
Ideally, stretch as soon as possible after your hike, while your muscles are still warm from the activity. Stretching once your muscles are cold and stiff can be a recipe for injury, so if you do that, make sure you warm up first. Most importantly, listen to your body and match your stretching to how you are feeling at the time – what works after one hike may not work after the next.
Disclaimer:
I am not a trained sports therapist, doctor, or other related professional. And I’m sure that’s very obvious! Rather, I am a keen and experienced hiker who’s learnt the hard way that stretching for hikers is vital. Please listen to your body; if you are in the slightest doubt or stretching is painful, stop and consult an expert.
Thanks to adidas for the gear and inspiration to help me keep a good routine. I’m excited to be part of the adidas blogger community this year; a (gifted-basis) collaboration ongoing throughout 2023. Photos feature my Terrex hiking gear and my Freehiker trainers.
What do you think? Comment below...